Slow Cooker Sunday: Banana Bread (2 Dec 12)

I was inspired by an entry on Slow Cooker Sunday last week to have a go at making Banana Bread in the Slow Cooker.  As a family we don’t tend to eat a lot of pudding and I don’t often bake, unless it’s a rainy day and struggling to find something to entertain my daughter.

Aly from plus2point4 is always doing fantastic puds in her slow cooker and I’ve been meaning to have a go for a while.  I was stunned, it worked brilliantly.  You may be wondering what the advantages to doing it in the slow cooker are as it takes longer.  I found it was much more moist than when I have made the same recipe in the over, plus, we could go out and do something else while it was cooking.  I wouldn’t leave a cooker unattended but I don’t worry when it’s the slow cooker.

I believe the recipe is originally American so the measurements are in volume rather than weight.  However, I do think any Banana Bread Recipe would work.


Slow Cooker Banana Bread

Recipe Type: Dessert
Cuisine: Slow Cooking
Author: Mediocre Mum
Prep time:
Cook time:
Total time:
Serves: 6
Ingredients
  • 435 ml plain flour
  • 2 tsp baking powder
  • ½ tsp salt
  • ¼ tsp baking soda
  • 82 ml butter or margarine
  • 165 ml sugar
  • 2 eggs, beaten
  • 3 ripe bananas, mashed
Instructions
  1. Grease and flour the slow cooker.
  2. Sift the flour, baking powder, salt and baking soda into bowl.
  3. Cream the butter and sugar in a separate bowl, and then mix in the eggs and banana.
  4. Gradually fold in the dry ingredients.  Don’t over mix.
  5. Pour into the slow cooker.  Cover and cook on high for 1.5-2 hours.  Mine took closer to 2.  To check if it’s ready insert a tooth pick and if it comes out clean then it should be ready.
  6. Let cool then invert onto a plate and ice if you want.

Now it’s your turn to inspire!

Don’t forget a more extensive list of recipes featured over the weeks can be found on Pinterest – Slow Cooker Sunday.


Doodle Bread

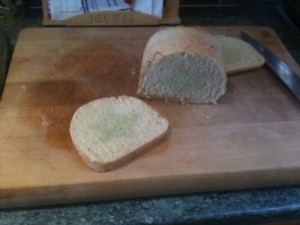
We were sent a Doodle Bread Making kit to try out.  It’s a very clever product and I think it would be a great gift idea.  We had great fun making it.  Any negative comments are not down to the product but ‘user error’ as I’m a disaster in the kitchen, as you’re all aware.  It all comes neatly laid out for you with very clear instructions.  All you have to do is add a bit of water and oil.  So, I’m not sure how I managed to mess it up!

I’m not very confident in the kitchen, so when I cook I follow recipes word for word and if there is anything missing disaster strikes.  So, I followed the instructions and whacked in 200 ml of water, which resulted in more of a pancake mixture than a ‘soft chewing gum texture’.  So I had to add more flour to get the texture right.  I think this is where it all started to go wrong.  I’d recommend adding a bit of water at a time until you get the right consistency!

Since I’ve never made bread before I didn’t realise that room temperature was important for it too rise.  It’s below zero here today.  I had a slight panic attack because it wasn’t rising. However, thanks to a lovely friend on twitter, I tucked it into the airing cupboard, amongst the sheets and towels, where it is nice and warm and it started to rise.  Phew!

I did oil the Doodle Shaper (star shaped thing) as per instructions but obviously not enough as I had trouble getting it out of the bread before popping it into the oven. Thankfully ‘the beauty of Doodle bread is imperfection as your star may look like a frog or a cloud??’

At one point I was a bit worried as Madame was very excited and kept asking me every 5 minutes if it was ready.  Luckily, it all worked out in the end and we got to enjoy warm fresh home-made bread smeared with a generous amount of butter.  Yum!

All in all I would definitely recommend this product.  But, if you get the opportunity to choose colouring I would go for something with more contrast as we had trouble seeing the star in ours.