Cheats way to decorate Easter Eggs!

We were inspired by the lovely Maggie from Red Ted Art to try our hand at decorating Easter Eggs.  It was incredibly easy and effective.

However, within 5 minutes of finishing decorating them my daughter has broken 8 out of the 12 eggs, playing Easter Bunny.  Oh well, the fun was in decorating them.

To dye the eggs

  1. Add 10-20 drops of food colouring into a bowl
  2. 1TBSP of vinegar
  3. 125ml of luke warm water

We ended up adding more food colouring as the colours weren’t vibrant enough.  The longer you leave them in the dye the darker they get.


To decorate

Once the eggs have dried, apply a selection of stickers.  I found a selection from Wilkinson’s in the stationery aisle, over 1200 for only £1.50.

Happy Easter!


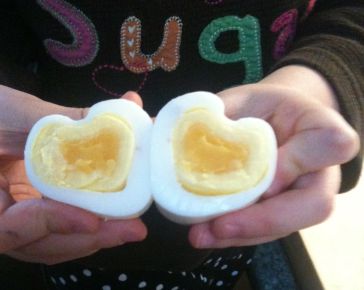
Egg-cellent! Heart Shaped Eggs!

One of my Aunts emailed me a list of ‘25 Clever Things’. She knows I’m not a Suzy Homemaker but there were a couple of good ones on there and this one grabbed my attention.

I think they’d be perfect for Valentine’s Day breakfast for your little ones and they were very easy to make.


You will need:

1 Hard boiled egg
A chopstick
2 rubber bands
Piece of card

Here’s what we did:

1) The original instructions called for a milk carton, but here in the UK I haven’t seen any as our milk tends to come in plastic jugs. I used a piece of card (approx 8x20cm), more specifically, the front cover of an estate-agents folder. I chose this as it had a coating so the egg didn’t stick t to it.

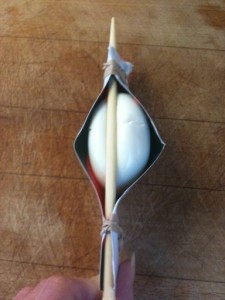
2) Fold the card in half. You may have to trim it a bit later. See picture.

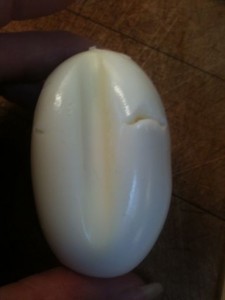
3) Peel the egg when it is still warm and place it in the card. The gently press the chopstick into it, not too hard, as I did and damaged the egg a bit. Then secure each end with a rubber band.

4) Then place in the fridge for 10-15 min.

5) Remove the package and but the egg in half perpendicular to the chopstick dent.